由於 Laravel 這個框架的底程程式語言為 PHP。就以 PHP 的開發環境來跟 Visual Studio Code 做整合介紹。
目的
以 Visual Studio Code 為我們整合的開發環境:Git, Terminal, PHP 的整合設定
這次介紹主要以 Windows 的作業系統平台來做範例。當然大多數的 Visual Studio Code 設定也適用於 Mac,只是在 Mac 的設定上會少很多 (主要是 Terminal 以 bash 為主,PHP 及 Git 的路徑設定在安裝完時已經 Ready 了)
環境
- Windows 10
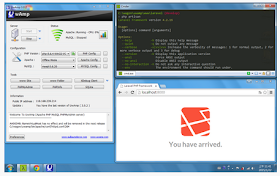
- wagon (v1.4.0) (WAMP 安裝整合包: 已包含 PHP)
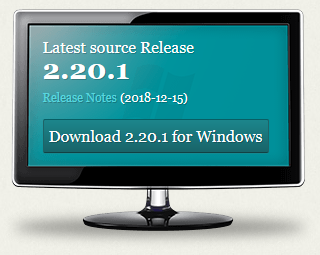
- Git (v2.20.1)
Windows 使用者環境變數
在 Windows 會使用 cmd 命令提示字元 (在 Mac 稱為 Terminal 終端機) 來輸入指令。
如果是使用 wagon 裡面的 cmder 來輸入指令,基本上 PHP 及 Git 的路徑都已經設定好了,所以要下 php 或 git 的指令,甚至是 composer 也都沒有問題。
但是要整合在本機環境也可以用,環境變數的設定就不可或缺了!
Git 在安裝時,已經會自動加入系統環境變數,這個部分我們就不去變更啦~
現在只要把 PHP 及 Composer 指定進來 (以 wagon 的路徑為例)

我個人是把 wagon 放在系統 D 槽磁碟機 (D:\wagon)
PHP 在 wagon 的位置為:D:\wagon\uwamp\bin\php\php-7.1.10
Composre 在 wagon 的位置為:D:\wagon\composer
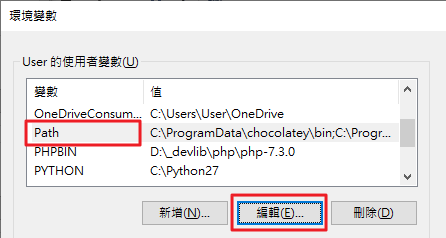
環境變數只需要指定到目錄層即可
環境變數設定步驟
在 本機 上按右鍵,選擇 內容

選擇 進階系統設定

選擇 環境變數

選擇變數為 Path 的選項,按 編輯
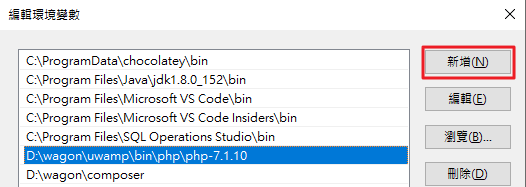
按 新增,把 PHP 跟 Composer 的路徑加上去即可
如此一來,開啟 cmd 命令提示字元 即可直接下達 php 及 composer 的指令了
到此為此的設定僅止於 cmd 知道的路徑而已,接下來我們要繼續為 Visual Studio Code 做一下整合設定。
Visual Studio Code 整合設定
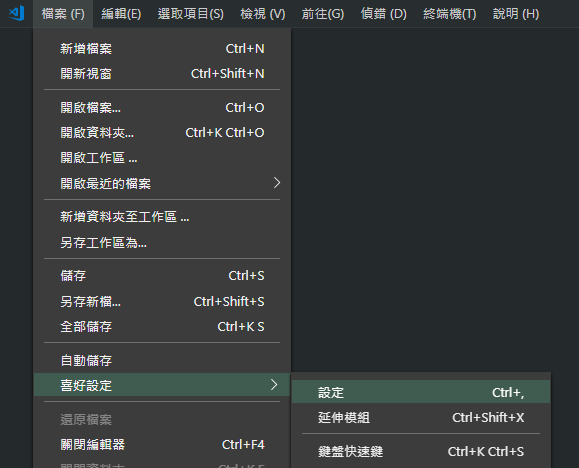
開啟 Visual Studio Code,檔案 -> 喜好設定 -> 設定
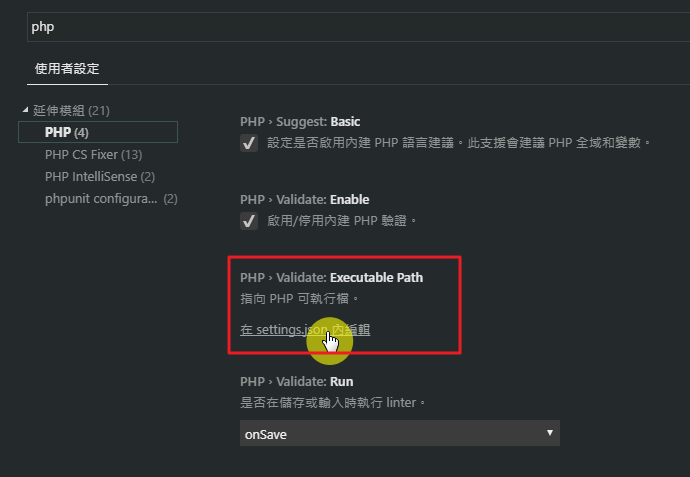
在搜尋框裡輸入 php,找到以下選項 PHP Validate: Executable Path,點選在 settings.json 內編輯
開啟 settings.json 後,會分左右兩個視窗,左邊是預設值,右邊是使用者的設定
按左邊筆的圖示,選擇 複製到設定
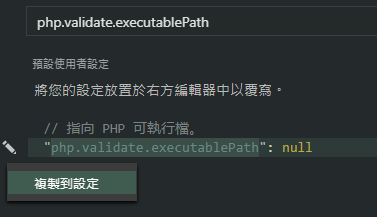
路徑的內容改成如下圖

Terminal 設定
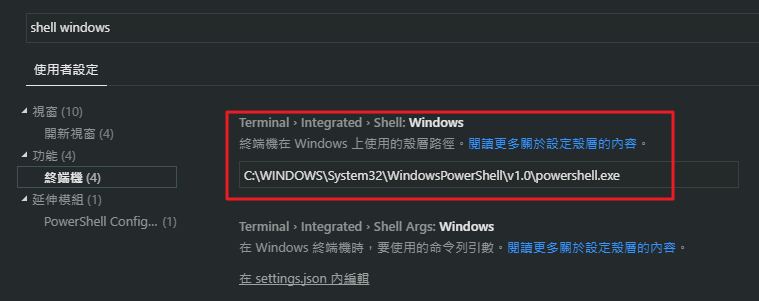
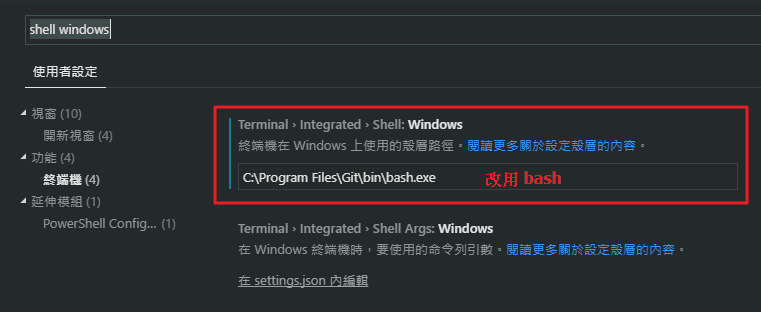
預設在 Windows 整合的 Terminal 為 PowerShell,若是要改成 cmd 或是 bash 可以搜尋 shell windows 來做變更設定
檢視 -> 終端機 開啟視窗 (會顯示在編輯器下方)
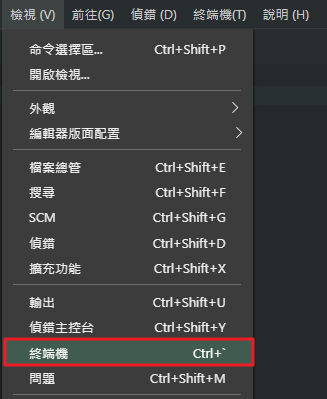

我個人習慣選擇 bash,因為我平常也用 Mac,指令才不會一下用 cmd 一下用 bash.
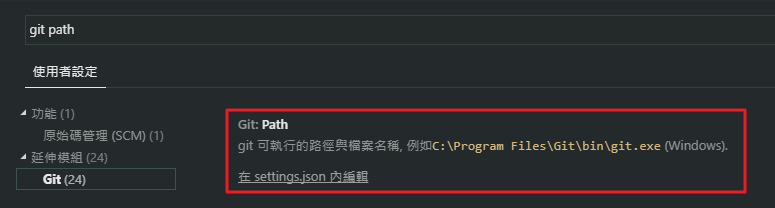
Git 設定
Visual Studio Code 本身就整合 Git 操作,預設 Git 路徑會抓系統安裝的 Git 路徑。
若未正確指定路徑,就無法正確使用介面上的操作。
編輯設定方法與 PHP 指定相同,就不再特別擷圖說明囉!
終於把所有的基本設定搞定啦!
結語
在 Windows 若要用指令,首先環境變數路徑的設定要先設好,以免下指令時找不到。
在 Visual Studio Code 則是設定: PHP, Git, 及 Terminal Shell 的執行檔路徑,明確告訴它,我要整合的工具在哪裡。
有疑問,歡迎留言提問囉!
沒有留言:
張貼留言